Insert Tables in Wordpress
How to insert tables in Wordpress (with or without a plugin)
Wordpress is the CMS of choice for millions of bloggers and website owners worldwide. The reason is its flexibility and ease of use. There are thousands of plugins to make tasks simpler in wordpress.
You can create stunning websites and attractive posts using wordpress and publish without any need for coding or need to edit html. It is why Wordpress is good for both coders and non coders.
While having some knowledge of html and css as well as JavaScript or php can also be good for Wordpress users, in most cases you can easily publish in Wordpress without the need to learn coding.
There are other content management systems also available in the market. However, when it comes to publishing content, Wordpress proves to be the first choice for most because of its user friendliness.
The Gutenberg block based editor allows users to easily add content and edit posts, including adding images and other elements like tables, images, cover images, quotes and even html blocks.
With the Gutenberg editor, which has nearly changed the way people have published content in Wordpress, you can create posts that are visually more attractive and provide a superior reading experience.
When you use the inbuilt Gutenberg editor in Wordpress, it allows you to include elements in your posts through the help of blocks. So, whether you need to insert an image, a quote, a table or any other element including code blocks, html code, or a short code, all you will need to do is to insert the block in your post by selecting the right block.
The Gutenberg block editor has also made it a lot easier to insert tables into posts including large tables with several rows and columns. It is made possible through the help of the table block.
Before the Gutenberg block was there, users relied on plugins or html code for inserting tables into wordpress posts. You can still use a plugin to insert tables into your wordpress posts, but if you want you can include visually attractive tables into your posts, without the need to install a separate dedicated plugin for the purpose.
In this post, we will discuss the methods to insert tables into Wordpress posts including the plugin and non plugin method. If you also know how to use CSS, you can give your own style to these tables. However, the Gutenberg block editor also allows you to manage the color and background of your tables so you create striking ones for your readers.
Insert tables into Wordpress using Gutenberg Block
The Gutenberg block editor offers the table block to create tables in Wordpress with header and footer. In most cases, if you need a simple table, you would not need to install a plugin unless you are dealing with complex data and very complicated tables. Moreover, the Gutenberg block includes style features that can make your tables look visually stunning.
.png)
You can easily insert a table in Wordpress using the Gutenberg blocks. Just search for the table block and click on it to insert it into your post where you need to insert the table.
Now, you can add as many rows and columns as you need. Once you have finalized the row count and column count, you can click on create table to add the table.
After inserting the block into your post, you can manage its settings from the block controls on the right. For example, you would like to insert a header to your table.
.png)
Toggle the header section button from the right sidebar in the Block section. (You can click anywhere inside the table to access the block controls in the right sidebar.) Now, you can add headers to each column.
In the image here, we have added a table with 4 rows and three columns. The header of the first column is year and that of the second and third columns is labeled Ford and Toyota respectively.
.png)
If you want the boxes in the table to be of equal size, you will need to enable fixed width cells from block settings in the right sidebar. Sometimes, you may want to add extra rows or columns to your table after having created the table. You can edit the table and add or remove rows and columns as you want.
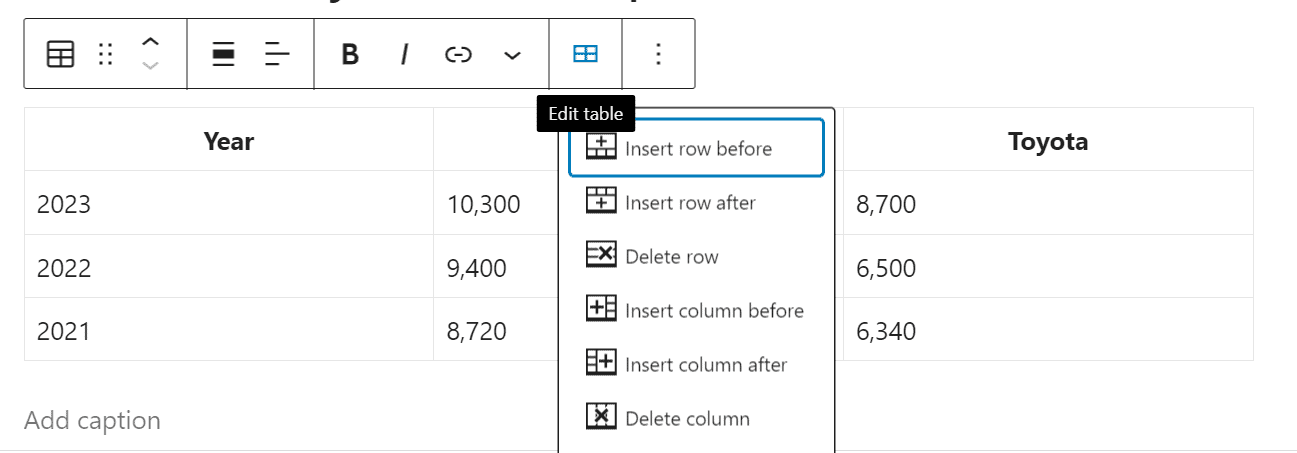
When you click on the table, you can access these from the edit table button. From the dropdown menu, you can select to add or remove rows and columns. To add a new row, click inside a cell and then click on ‘edit table’. Now, you can select to add a row before or after the row inside which you clicked or a column before or after the selected column.
Enter data inside the cells and your table is ready. You can also add a caption to your table if you like.
If you want to further style your table like changing background color or changing the text color, you can do it from the style tab in the right sidebar beside the block settings. Click on the style tab and then you can change the styling of your table.
.png)
The default background color is white. However, if you want you can select stripes for your table design. Otherwise, you can give a distinct design to your table by selecting a solid color background or gradient background.
In case you want to give your table a gradient background, Gutenberg offers a nice range of readymade gradient combinations to select from.
Otherwise, you can add some CSS and give your table heading a distinct color to make your table look more attractive. For example, I gave the color seagreen to the header section and then changed the text color to white using the following CSS:
th {background-color: #04AA6D;
  color: white;}
.png)
So, this is how you can manually add attractive looking tables to your Wordpress posts. In most cases, users want to avoid the use of an extra plugin if they can. If they need just a simple table with few cells and no extra features to sort data, they can easily do it with the help of the Gutenberg block.
If you need extra features like sorting and search, you can add them to your tables with the help of a dedicated plugin, which we will discuss in the next section. If you are good with html, you can also create and insert tables into Wordpress using html. Write the html for your table and insert it into Wordpress using the html Gutenberg block.
Insert Tables into Wordpress With a Plugin
One can also insert tables into Wordpress using a plugin, with which one can create very large tables with cells in hundreds.
Moreover, a dedicated plugin can help you insert search and make sorting possible so that users can sort the data in the table according to their need.
If you are working with data and large tables, you must use a dedicated plugin to manage tables in Wordpress because in that case the functionality offered by the Gutenberg table block may be too limited. However, the good news is that you have a very nice plugin named Tablepress to manage tables in Wordpress.
.png)
The Tablepress plugin provides a user-friendly interface for inserting data into tables and then allows you to insert these tables into Wordpress. It comes loaded with tons of features including sorting, search/filtering, pagination as well as horizontal scrolling which allows you to create and add tables to your posts that can provide your readers with an awesome reading experience.
You can create tables (as large as you need) and then you can insert them into the posts with the help of simple shortcodes. Each table you create is numbered and can be included inside a post through the use of a corresponding shortcode.
Tablepress is a highly popular Wordpress plugin for creating attractive tables and inserting them into Wordpress posts. It is rated five out of five in the Wordpress repository from more than four thousand ratings, which is a testimony to the performance of the plugin and its useful features.
Now, all you need to do is to install and activate the plugin to start adding tables in Wordpress. Just go to the Wordpress plugin repository from your Wordpress dashboard and then search for Tablepress. Install and activate the plugin from the p/lugin repository like you would install and activate any plugin.
Before moving ahead, I would like to inform you that the plugin also comes in pro and max versions for users that have more extensive needs and the premium versions including pro and max support several additional features that will come in handy for users with extensive needs.
.png)
The pro version can be bought for $79 per year while the max version which includes several more features and can help you create even user-friendly tables is available for $189 per year. Moreover, these tables created with the tablepress plugin can be easily exported.
The free version of the plugin is loaded with a ton of features that offer more flexibility in terms of creating tables compared to the inbuilt table block in Wordpress.
Once you have installed and activated the Tablepress plugin, go to the Wordpress dashboard and hover your mouse over the Tablepress settings, which can be found right above ‘Appearance’.
.png)
From here, you can select to create a new table as well as check out existing tables and set plugin options like extra css.
The process of adding a table using the Tablepress plugin is very simple and very similar to the process you follow for adding tables using the Gutenberg table block. Click on add new table.
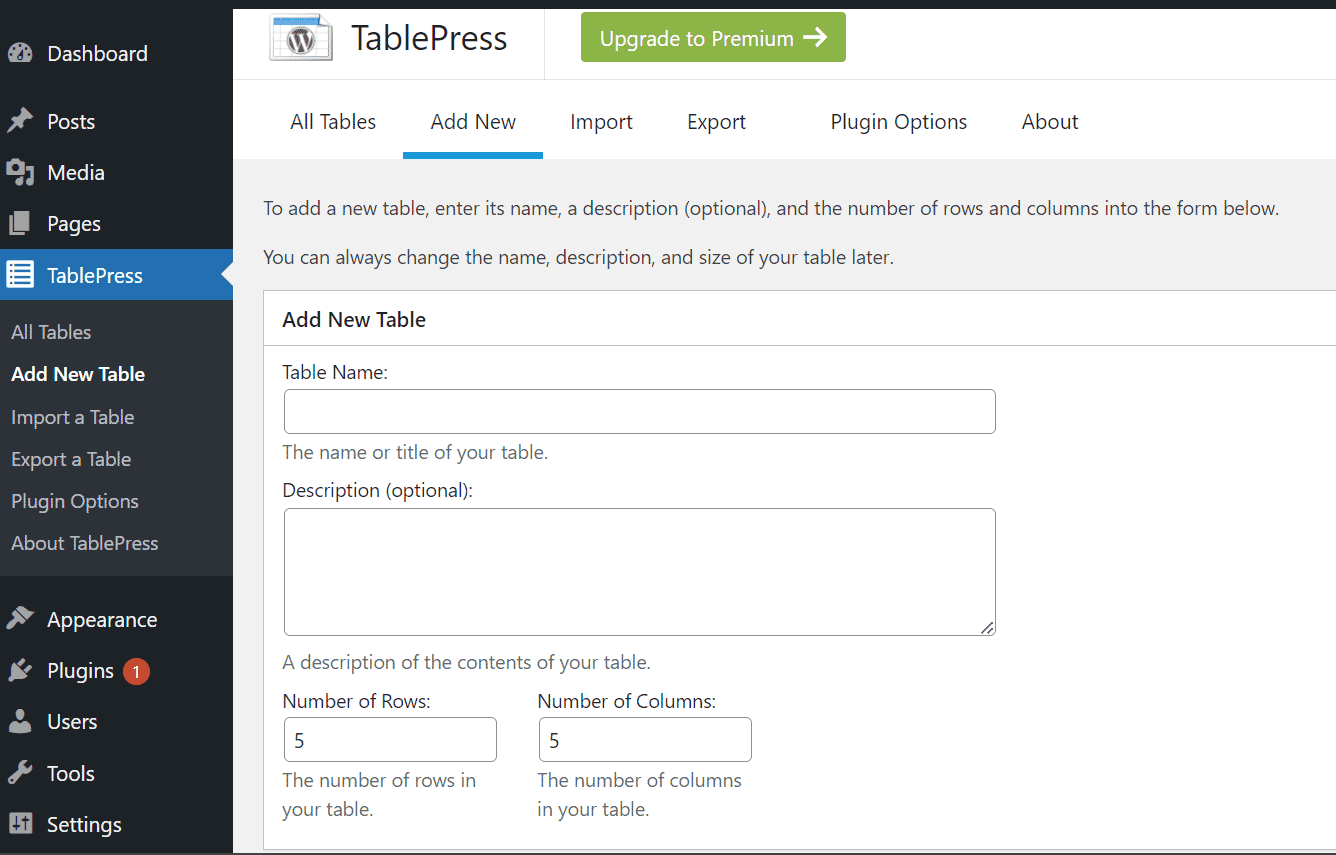
Now add the table name and a nice description and select the number of rows and columns for your table. Once you have entered this information, click on create table.
You will be taken to the next screen which includes all the table information and settings. Hre you can enter the table data and change other settings like color of the table.
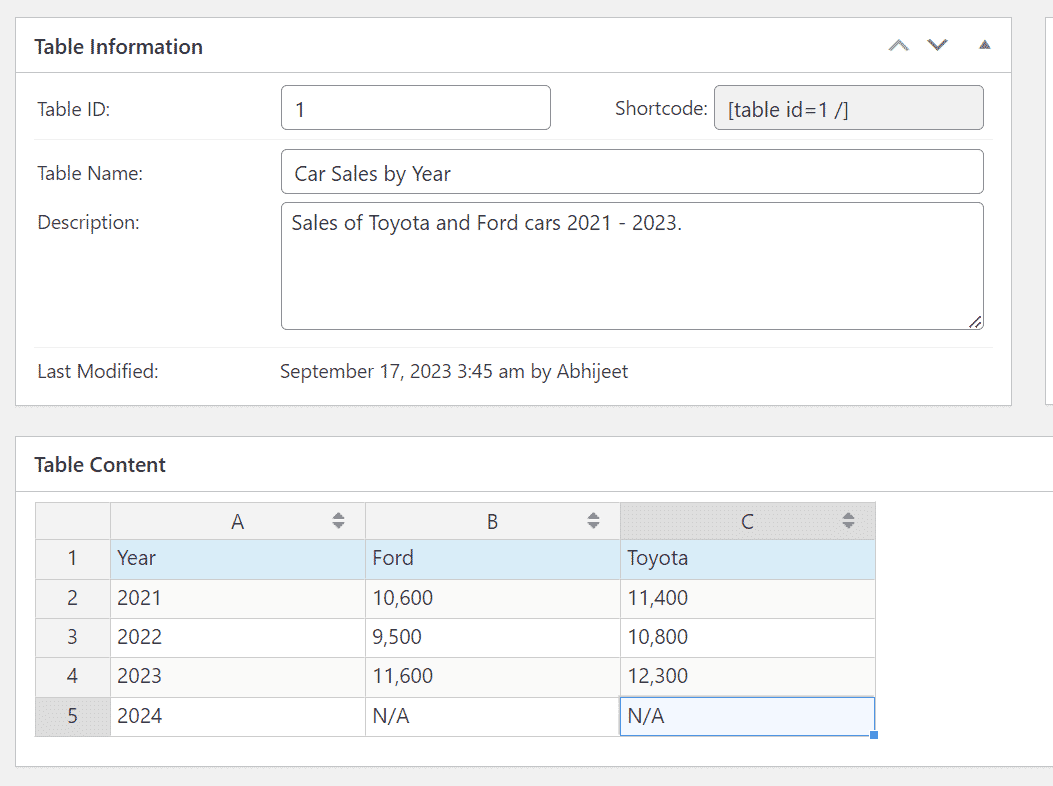
The table settings are divided into three sections including table manipulation, table options and table options for site visitors. In case you need to make changes to the existing rows or columns, you can do so from the table manipulation settings.
In the table options settings, you can set to have a header section for your table as well as alternating colors for the table. You can also enable row hover highlighting from this section.

The last section in table settings is titled Table features for Site Visitors. It includes the following features:
Enable Visitor Features: This allows you to enable every feature in this section so select this checkbox.
Sorting: You can enable this feature to allow your visitors to sort tables.
Search/Filtering: Enable this feature to allow the visitor to filter or search the table. The table will only show the rows with the keyword searched for.
Pagination: If you enable pagination, visitors will be able to see only a certain number of rows at a time. For example, if your table has 100 rows, you can select to show only ten rows or twenty rows at a time. Visitors can click on next to see the next ten rows.
Pagination length change: Enabling this feature will allow the visitors to change the pagination length or select the number of rows showing at a time.
Info: Enabling this feature will show the table information to the visitor like information about the currently visible data (number of rows).
Horizontal Scrolling: Enable this feature since it makes it easier for the visitors to check out several columns of data at the same time.
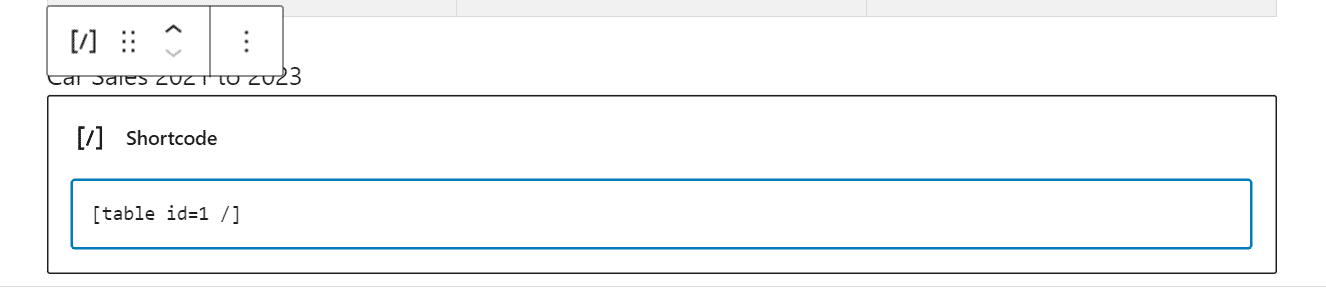
After having created the table and adjusted the settings, you can click on save changes. This will save the table. To insert this table into a post, all that you need to do is to copy the shortcode provided at the top like [table id=1 /] and insert it into a post where you want to insert the table using the Gutenberg shortcode block.
Now, publish the changes and then check out at the front end. You will see an attractive looking table with the search and sorting features enabled.
.png)
A few last words:
You can insert tables into Wordpress using either the plugin method or without the help of a plugin. The Gtenberg block editor has made it a lot easier to create stylish tables. However, if you are dealing with larger tables and frequently need to add and edit tables in Wordpress, then the Tablepress plugin would be your best option.
This plugin is loaded with features and if you need, you can also import tables from CSV or excel spreadsheet to insert into Wordpress using Tablepress. If you are dealing with simple tables that are less than 10 rows long, then just use the Gutenberg block editor.
You can make the tables searchable and sortable when using the Tablepress plugin. This is more suited for cases where you have to insert longer tables into your posts frequently or you have a website dedicated to data and tables. You can also add your own CSS to the Tablepress plugin to make your tables appear more stylish.