How to Create a GA4 Property
.webp)
How to Create a GA4 Property for Your Website/Blog
Google Analytics is a handy tool when it comes to understanding audience and measuring your site traffic. Apart from real time visits and daily visits, you can learn about the pages receiving the highest number of visits, keyword popularity, geographical audience and more that can help you bolster SEO and create the right content and SEO strategy.
Universal Analytics has been retired by Google and users must switch to creating a GA4 property for their websites. The settings and method to create a GA4 property are slightly different than the Universal Analytics that we had been using previously for several years.
To create a new GA4 property you first need to login to your Google analytics account and click on the admin button at the bottom on the left side.
Now, you can add a new property here from the admin panel. Click on add new property.
In the first step, you are required to enter the basic property details including the property name. For property name, enter the base url of your website like example.com.
Following that you will be required to add the business details in the next step. Select the industry and enter the business details which is how many employees your organization has. Now, click on next and go to the next step, where you will be required to add your business objectives that you want to achieve from Google analytics.
If you are going to use Google analytics for a blog, you can select to create brand awareness and to measure user behavior. Objectives can be different depending on the type of website and the type of business. If it is an ecommerce website, you might be interested in generating leads or creating baseline reports. So, select the objectives according to your needs and then move ahead to creating the property.
Once you have selected the necessary option in this step, please click on the create button and create the property. While this will create the property there are additional steps to be completed before you can start using GA4 on your web property.
In the next step, you will be required to select the platform on which you intend to use the GA4 code. There are three options in this regard including web, iOS and Android platform. Since we are planning to use it on a blog, we will select the web platform.
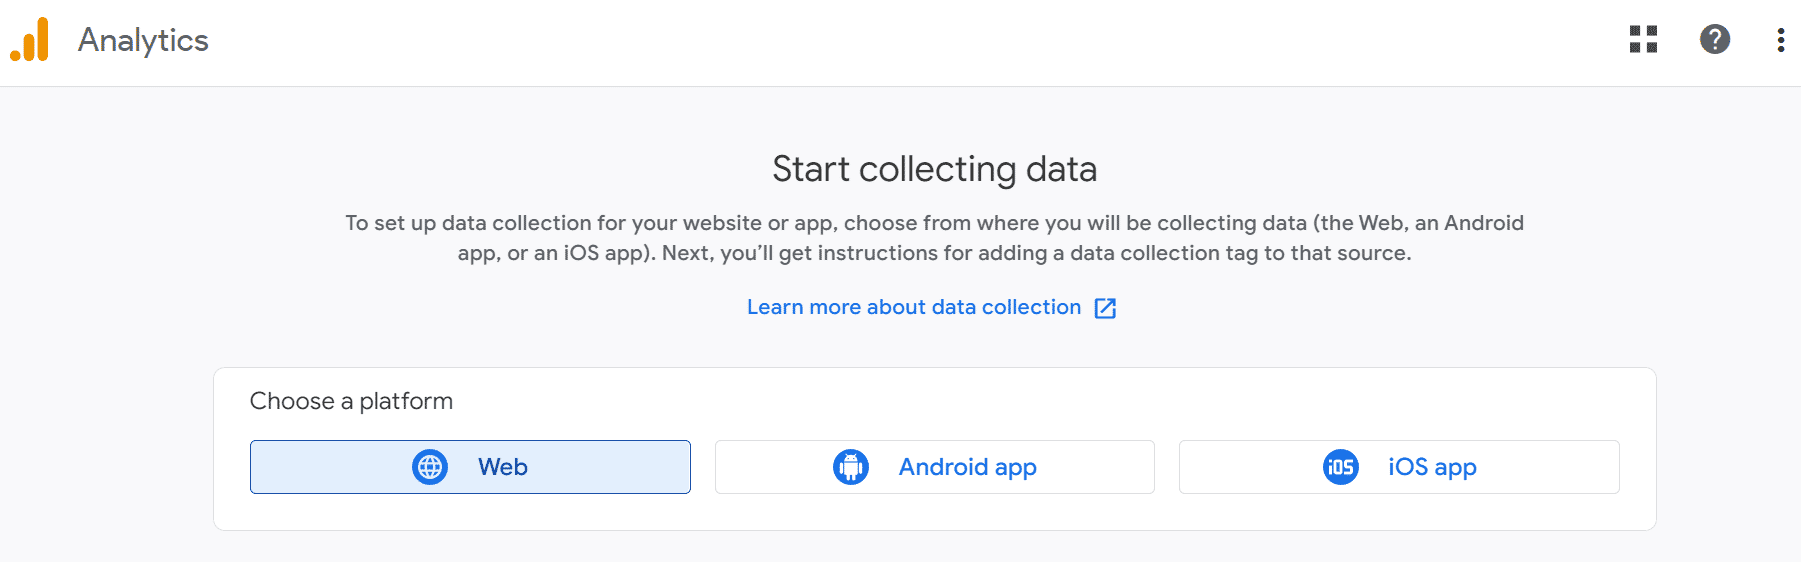
Choose web as the datastream and you will be taken to the page where you can further customize your data stream. In this step, you are required to enter the website url and website name for customizing the web stream. Please, enter the website url and then website name for stream name.
If it is a blog and you want to measure only the pageviews, please switch off the enhanced measurement option since you will not need all the options included with enhanced measurement option. This will remove the unnecessary options, and now the GA4 code will only measure the page views.
Now, click on create stream. Once you have clicked on the create stream button, you will be taken to the next page, where you will be provided with the stream id and measurement id. Note the measurement id since it is what you will need mainly if you are planning to use a plugin for installing GA4 code on your wordpress property.
However, Google provides you detailed instructions for installing GA4 on your website. You can use a plugin like Monster Insights to install it or Google’s site kit plugin. However, if you are using another CMS than Wordpress, there are also instructions provided for installing the GA4 code on them.
.png)
You have two options to install the GA4 code. Either install it with a website builder or CMS or you can install it manually using the gtag.js. To directly include the code in your website them, just copy the code and enter it manually into the header.php right below the tag.
Once you have installed the GA4 analytics code on your website, wait a little and check in your Google analytics account. It will have started recording the data related to pageviews and you can check real time data as well as other data for your website.