How to Add Headings in Wordpress Posts
Headings are a crucial part of your wordpress posts. While they make your content more readable, headings also serve an SEO purpose.
You can add headings to your posts - H1 to H6 - to organize your content and give it a proper structure. However, in most cases, we generally do not use beyond the H4 tags. So, in this post, I will keep the discussion limited to H1 to H4 tags.
Why do we use headings in our posts?
The H1 tag is generally reserved for the title of our wordpress posts. However, since we need to neatly organize the rest of our content, we use headings from h2 to h4 to achieve that.
These heading tags are used to divide the content into various sections and they follow a hierarchy. It means h3 tag comes after the H2 tag and H4 tag comes after the H3 tag. If you want to begin another section in your post, you must start with another H2 tag and then add H3 and H4 tags for further subdividing the content.
To find out how heading tags are used in a blog post, you can check out the source by clicking on ctrl + U. In the source page that opens, you can find h1 and h2 tags using ctrl + F. You will see that the title of the post is wrapped in h1 tags.
Headings are used to provide a definite structure to the post. Think of a long post you have read online and how it is divided into various sections using headings and subheadings that stand out in large and bold fonts.
However, the purpose of headings is not limited to just making the fonts bold or making a post visually attractive. Its main purpose is to structure the content in a manner that makes it more readable to the user. Users can skip to the part of the content that they are interested in using these headings.
For example, when you are writing on a topic, you give your post an attractive title that informs the readers about what your post is about. You write an introduction and then you add the main content which is several paragraphs long. You can add a heading 2 or H2 to convey the main idea of the first section of your content. Using H3 and H4, you can divide the content into smaller sections and subsections.
Add headings in Wordpress using Gutenberg block
In wordpress adding headings is very easy. You do not even need to edit html since the gutenberg visual editor makes it very easy to add heading or paragraph tags to your content. The H1 tag is generally reserved for the title and so you can start formatting your content using H2 tags in wordpress.
To add a heading, just type out the heading like you type a paragraph. Now click on the content of the line you added and in the menu that opens above click on the first paragraph sign and from the dropdown select heading. This will automatically apply the H2 tag to the line you just typed. All you need to do is to add a heading in wordpress using Gutenberg block is to type out the heading and then apply the heading tag.
.png)
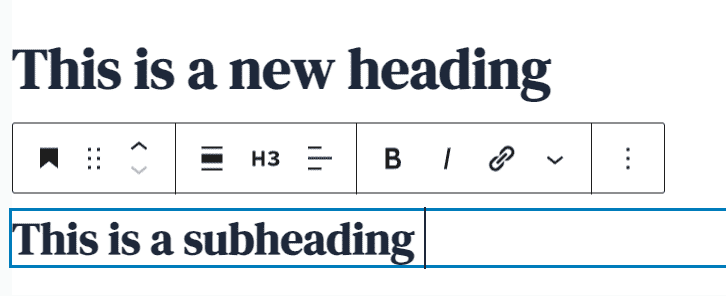
Now, if you click on the heading you just created, you will see H2 in the box that appears above. Click on it and you will see the rest heading tags from h3 to h6 below it. So, if you want to apply nh3 or h4 or any other tag, you just need to click on that tag to apply it. When you first change a paragraph into heading, it automatically applies the H2 tag. Now, if you need to apply H3 or H4, you must change the H2 into that tag.

That’s all and that’s how you can easily add headings and make your content attractive and well structured as well as more readable.
Please note that when you type out any content in Wordpress, it is in the form of the paragraph block. In Wordpress, headings now come in the form of Gutenberg Blocks. All you need to do is to change from the paragraph block to heading block to make a line a heading. Then you can further change the type of heading you want like H2, H3, H4 or further.