Aws Route 53 Create Hosted Zone
AWS Route 53 Create Hosted Zone
Amazon ‘s Route 53 is among the fastest DNS services. It is a highly available and scalable DNS service and also highly cost effective. Its globally dispersed DNS server and automatic scaling connect users reliably to your website. It is very easy to set up your hosted zone on route 53. You can customize routing policies to decrease latency and improve application availability. The customers of Route 53 include leading names like McDonald’s, Netflix and Slack.
In this article, we will show you how to set up a hosted zone on Route 53 for your website and route traffic reliably to your website from across the globe. You can create a hosted zone in Route 53 using either the AWS console or the AWS CLI and we are going to discuss both the methods in this post. If you are a CLI user, it is easy and simple to create a hosted zone with a single command.
Create AWS Route 53 Hosted Zone
To route traffic to your website reliably using the ROUTE 53 DNS servers, you need to create a hosted zone for your website. Go to your AWS account and search for Route 53. From the Route 53 dashboard, go to hosted zones and then click on the create hosted zone button. Now, enter the domain name and a description for your website’s hosted zone. Keep the default selection of public hosted zone and then click on create. When your hosted zone is created, you have two types of records including NS and SOA records already there in the account.
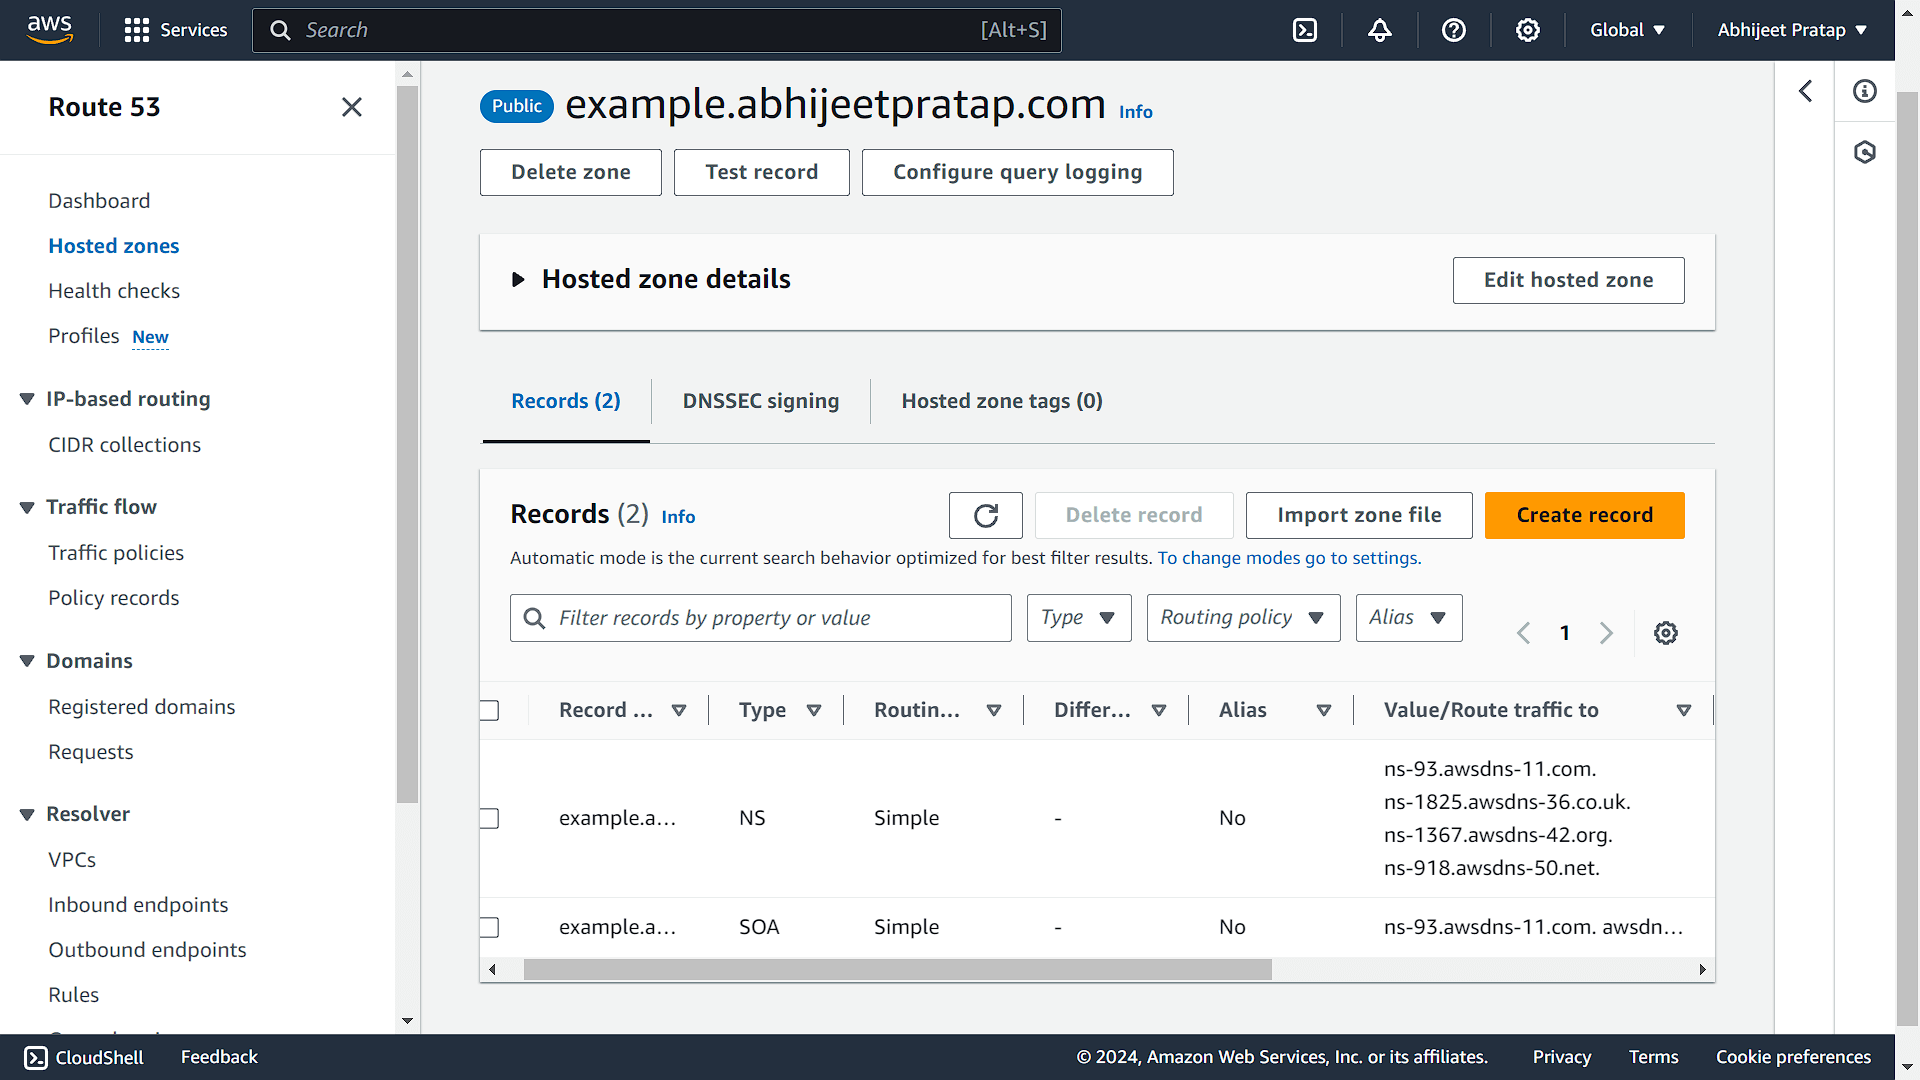
You will need to change the nameservers and replace them with the four NS records provided by AWS.
Suppose, you have a domain registered with Godaddy. Then, you need to go to your Godaddy account and click on Domains. Now, click on DNS after selecting the right domain and then on nameservers. Change the nameservers and add the four NS records provided by Route 53. Save and exit.
Now, you can add A records for your website to the Route 53 account. Click on create records and then add an A record with the ip address of your server. You can create two A records, one for the root domain and one for the www subdomain. Set the ttl according to your need. If you want DNS to propagate faster, select one minute or 60s for TTL and continue with the default selection for routing policy.
You have set up the hosted zone for your domain and now Route 53 will start routing traffic from the internet to your website.
Route 53 Create Hosted Zone Using AWS CLI
The AWS CLI or command line interface is a great tool for creating resources on AWS. It is sometimes faster to do things using the CLI. All you need to do is to install the CLI locally on your machine and you can get started.
You can download the installer from the following link : https://awscli.amazonaws.com/AWSCLIV2.msi
Or you can also run the installer from the command prompt:
msiexec.exe /i https://awscli.amazonaws.com/AWSCLIV2.msi
Provider the necessary details when prompted and done.
To check if CLI has been installed properly, you can check aws version:
aws-cli/2.15.36 Python/3.11.8 Windows/10 exe/AMD64 prompt/off
Create Route 53 Hosted Zone
To create a Route 53 hosted zone, you need to run the create-hosted zone command like the following:
aws route53 create-hosted-zone --name example.abhijeetpratap.com --caller-reference 2024-05-16-18:47
The output will look like the following:
 aws route53 create-hosted-zone --name example.abhijeetpratap.com --caller-reference 2024-05-16-18:47
{
    "Location": "https://route53.amazonaws.com/2013-04-01/hostedzone/Z094218517BS7JUTMMTGP",
    "HostedZone": {
        "Id": "/hostedzone/Z094218517BS7JUTMMTGP",
        "Name": "example.abhijeetpratap.com.",
        "CallerReference": "2024-05-16-18:47",
        "Config": {
            "PrivateZone": false
        },
        "ResourceRecordSetCount": 2
    },
    "ChangeInfo": {
        "Id": "/change/C075684619Z5DXQO38L6E",
        "Status": "PENDING",
        "SubmittedAt": "2024-05-16T03:27:28.760000+00:00"
    },
    "DelegationSet": {
        "NameServers": [
            "ns-93.awsdns-11.com",
            "ns-1825.awsdns-36.co.uk",
            "ns-1367.awsdns-42.org",
            "ns-918.awsdns-50.net"
        ]
    }
}
Now, you can add further records to the hosted zone.